1. Brief
In 2018, the university carried out on-campus wireless network transformation, achieving full coverage of wireless network in the teaching and research office area and student dormitory area, and teachers and students can choose to access the Internet through the campus wired network or wireless network. Smart terminals such as desktops, laptops, pads, mobile phones and other smart terminals can access the campus network anytime and anywhere.
The wireless network identification SSID currently provided by our university is BFSU, which adopts the more secure 802.1x authentication method, which enables one-time authentication and permanent use, i.e., perception-free encrypted connection (authentication is required for the first login, and automatic connection is made within the signal range in the future).
Each user account allows up to three wireless devices to be online at the same time. If you want to use a fourth wireless device to connect, you must first turn off the wireless function switch of the previous device, otherwise you cannot connect.
2. Connection method
Below is the specific setup method of 802.1x authentication method on common iOS, Android, Windows, Mac OS X and other operating systems for reference.
(1) iOS setup method
"Settings -> Wireless LAN", select "BFSU" wireless connection (see Figure 3-1).
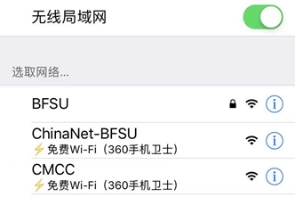
(Figure 3-1)
Enter the user name and password in the pop-up interface, and then click "Join" in the upper right corner, then you can connect to the school wireless network in encrypted mode (see Figure 3-2). Within the coverage area of campus wireless network, the device will be connected to the network automatically without repeating the operation.
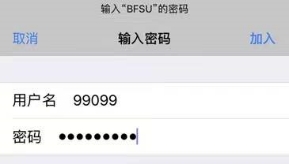
(Figure 3-2)
When you connect for the first time, if there is a warning message as shown in Figure 3-3, click "Trust" in the upper right corner.
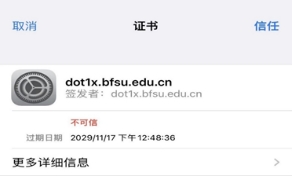
(Figure 3-3)
(2) Android setting method
Under "Settings"->"WLAN", select "BFSU". In the pop-up interface, select "PEAP" for "EAP Method", "mschapv2" for "Stage 2 Authentication", "CA Certificate" for default, and "Identity" for "BFSU". ", "CA Certificate" choose default, "Identity" column fill in the enrolment work number (i.e. Internet account), "Anonymous Identity" choose blank (no need to fill in), "Password" choose blank (no need to fill in). (no need to fill in), fill in the password in the "Password" column, and keep the other options in the default state, and then click "Connect", that is to say, you can connect to the wireless network in an encrypted way (see Figure 3-4). In the wireless on state, when the user enters the wireless network coverage area, the device will automatically connect to the network without repeating the operation.

(Figure 3-4)
(3) Windows 10 setup method
Click the network icon at the bottom right corner of the desktop, select "BFSU" in the pop-up list, and keep "Auto Connect" in the ticked state, then click "Connect" (see Figure 3-5). ), and then click "Connect" (see Figure 3-5).
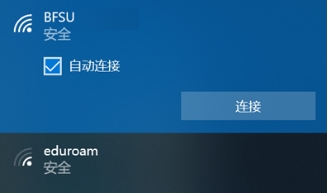
(Figure 3-5)
Enter your user name and password in the pop-up interface and click "OK" (see Figure 3-6).
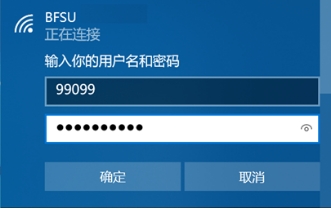
(Figure 3-6)
When connecting for the first time, if the message as shown in the figure appears, click "Connect" to connect to the school's wireless network in an encrypted way (see Figure 3-7). When the wireless network is turned on, the device will automatically connect to the network when the user enters the wireless network coverage area, no need to repeat the operation.
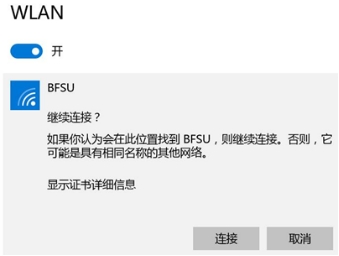
(Figure 3-7)
(4) Mac OS X setup method
Click the wireless network icon on the top right corner of the desktop, and select "BFSU" in the pop-up list (see Figure 3-8).
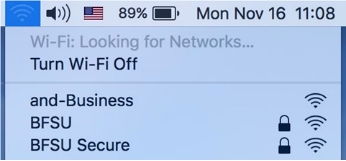
(Figure 3-8)
Enter your user name and password in the pop-up screen (see Figure 3-9).
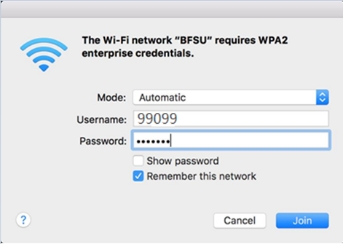
(Figure 3-9)
Click "Join" to connect to the school's wireless network in encrypted mode. When the wireless network is turned on, the device will automatically connect to the network when the user enters the wireless network coverage area, no need to repeat the operation.
(5) Windows 7 setup method
Right-click on the network, select "Open Network and Sharing Centre" (see Figure 3-10-1), click "Manage Wireless Networks" (see Figure 3-10-2).
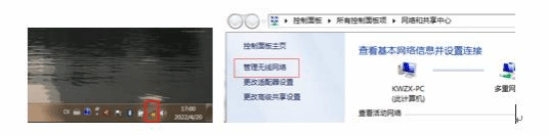
(Figure 3-10-1) (Figure 3-10-2)
Click Add (Figure 3-10-3) and select Manually Create Network Profile (see Figure 3-10-4).

(Figure 3-10-3) (Figure 3-10-4)
Enter "BFSU" for the network name, select "WPA2-Enterprise" for the security type, then click "Next" (see Figure 3-10-5), click "Change Connection Settings" (see Figure 3-10-6), and then click "Change Connection Settings" (see Figure 3-10-6). "Change Connection Settings" (see Figure 3-10-6).

(Figure 3-10-5) (Figure 3-10-6)
Select "Security" in the menu bar (see Figure 3-10-7), click "Settings" in the "Security" window (see Figure 3-10-8).
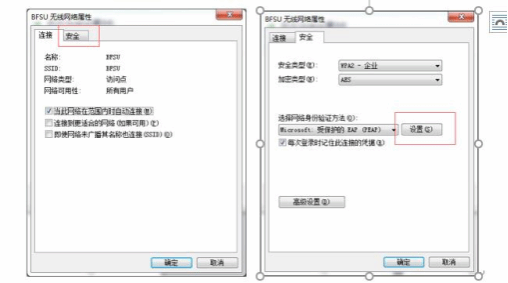
(Figure 3-10-7) (Figure 3-10-8)
Uncheck "Validate server certificate" (see Figure 3-10-9) and select "Configure" (see Figure 3-10-10).
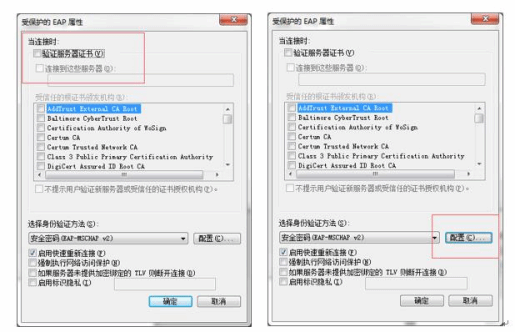
(Figure 3-10-9) (Figure 3-10-10)
Uncheck "Automatically use Windows logon name and password (and domain, if any)" and click OK on this screen (see Figure 3-10-11), then click OK on the "Protected EAP Properties" screen.
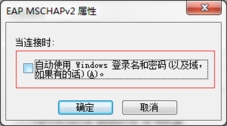
(Figure 3-10-11)
Select "Advanced Settings" in the "Security" interface (see Figure 3-10-12), tick "Specify authentication mode" (see Figure 3-10-13), click "OK". "OK", and then click "OK" in the "Security" menu.
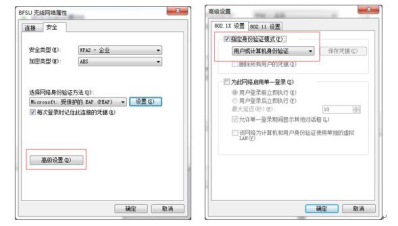
(Figure 3-10-12) (Figure 3-10-13)
After the setting is completed, click on the BFSU signal in the wireless network list and enter your academic number and Digital North password to successfully access the Internet.